Create a simple shared AR experience v0.5
This section describes how to use ConjureKit and Manna module to create a shared AR experience from scratch in Unity.
Before you begin
Before getting started, complete the following steps:
- Check the Prerequisites.
- Set up your development environment by following the steps in the Quickstart.
Preparing the project with ARFoundation
- Configure the project for XR development. Go to Edit -> Project Settings -> XR Plug-In Management
- -> iOS and enable the ARKit checkbox for iOS devices.
- -> Android and enable the ARCore checkbox for Android devices.
- Configure build parameters. Go to Project Settings -> Player
- -> iOS -> Other Settings -> Camera Usage Description and write a camera description, e.g., "AR requires a camera".
- On Android, this permission is automatically added to manifest on build. Android will ask for Camera permissions when the app will first run.
- -> Android -> Other Settings and have
- Auto Graphics API disabled and OpenGLES3 at the top of the list
- Scripting backend set to IL2CPP and both ARMv7 and ARM64 selected in Target Architectures
- -> iOS -> Other Settings -> Camera Usage Description and write a camera description, e.g., "AR requires a camera".
- Go to Package Manager -> Unity Registry, and Install ARFoundation.
We suggest to check which ARFoundation and ARKit/ARCore package versions are installed by Package Manager, as they might not be equal. This is not automatically handled when installing a "Preview" version and mismatch can happen.
ARFoundation versions below 4.2.6 do not support iOS 16.
ConjureKit currently does not yet support ARFoundation 5.
- Start with an empty scene with no GameObjects.
- Create a new
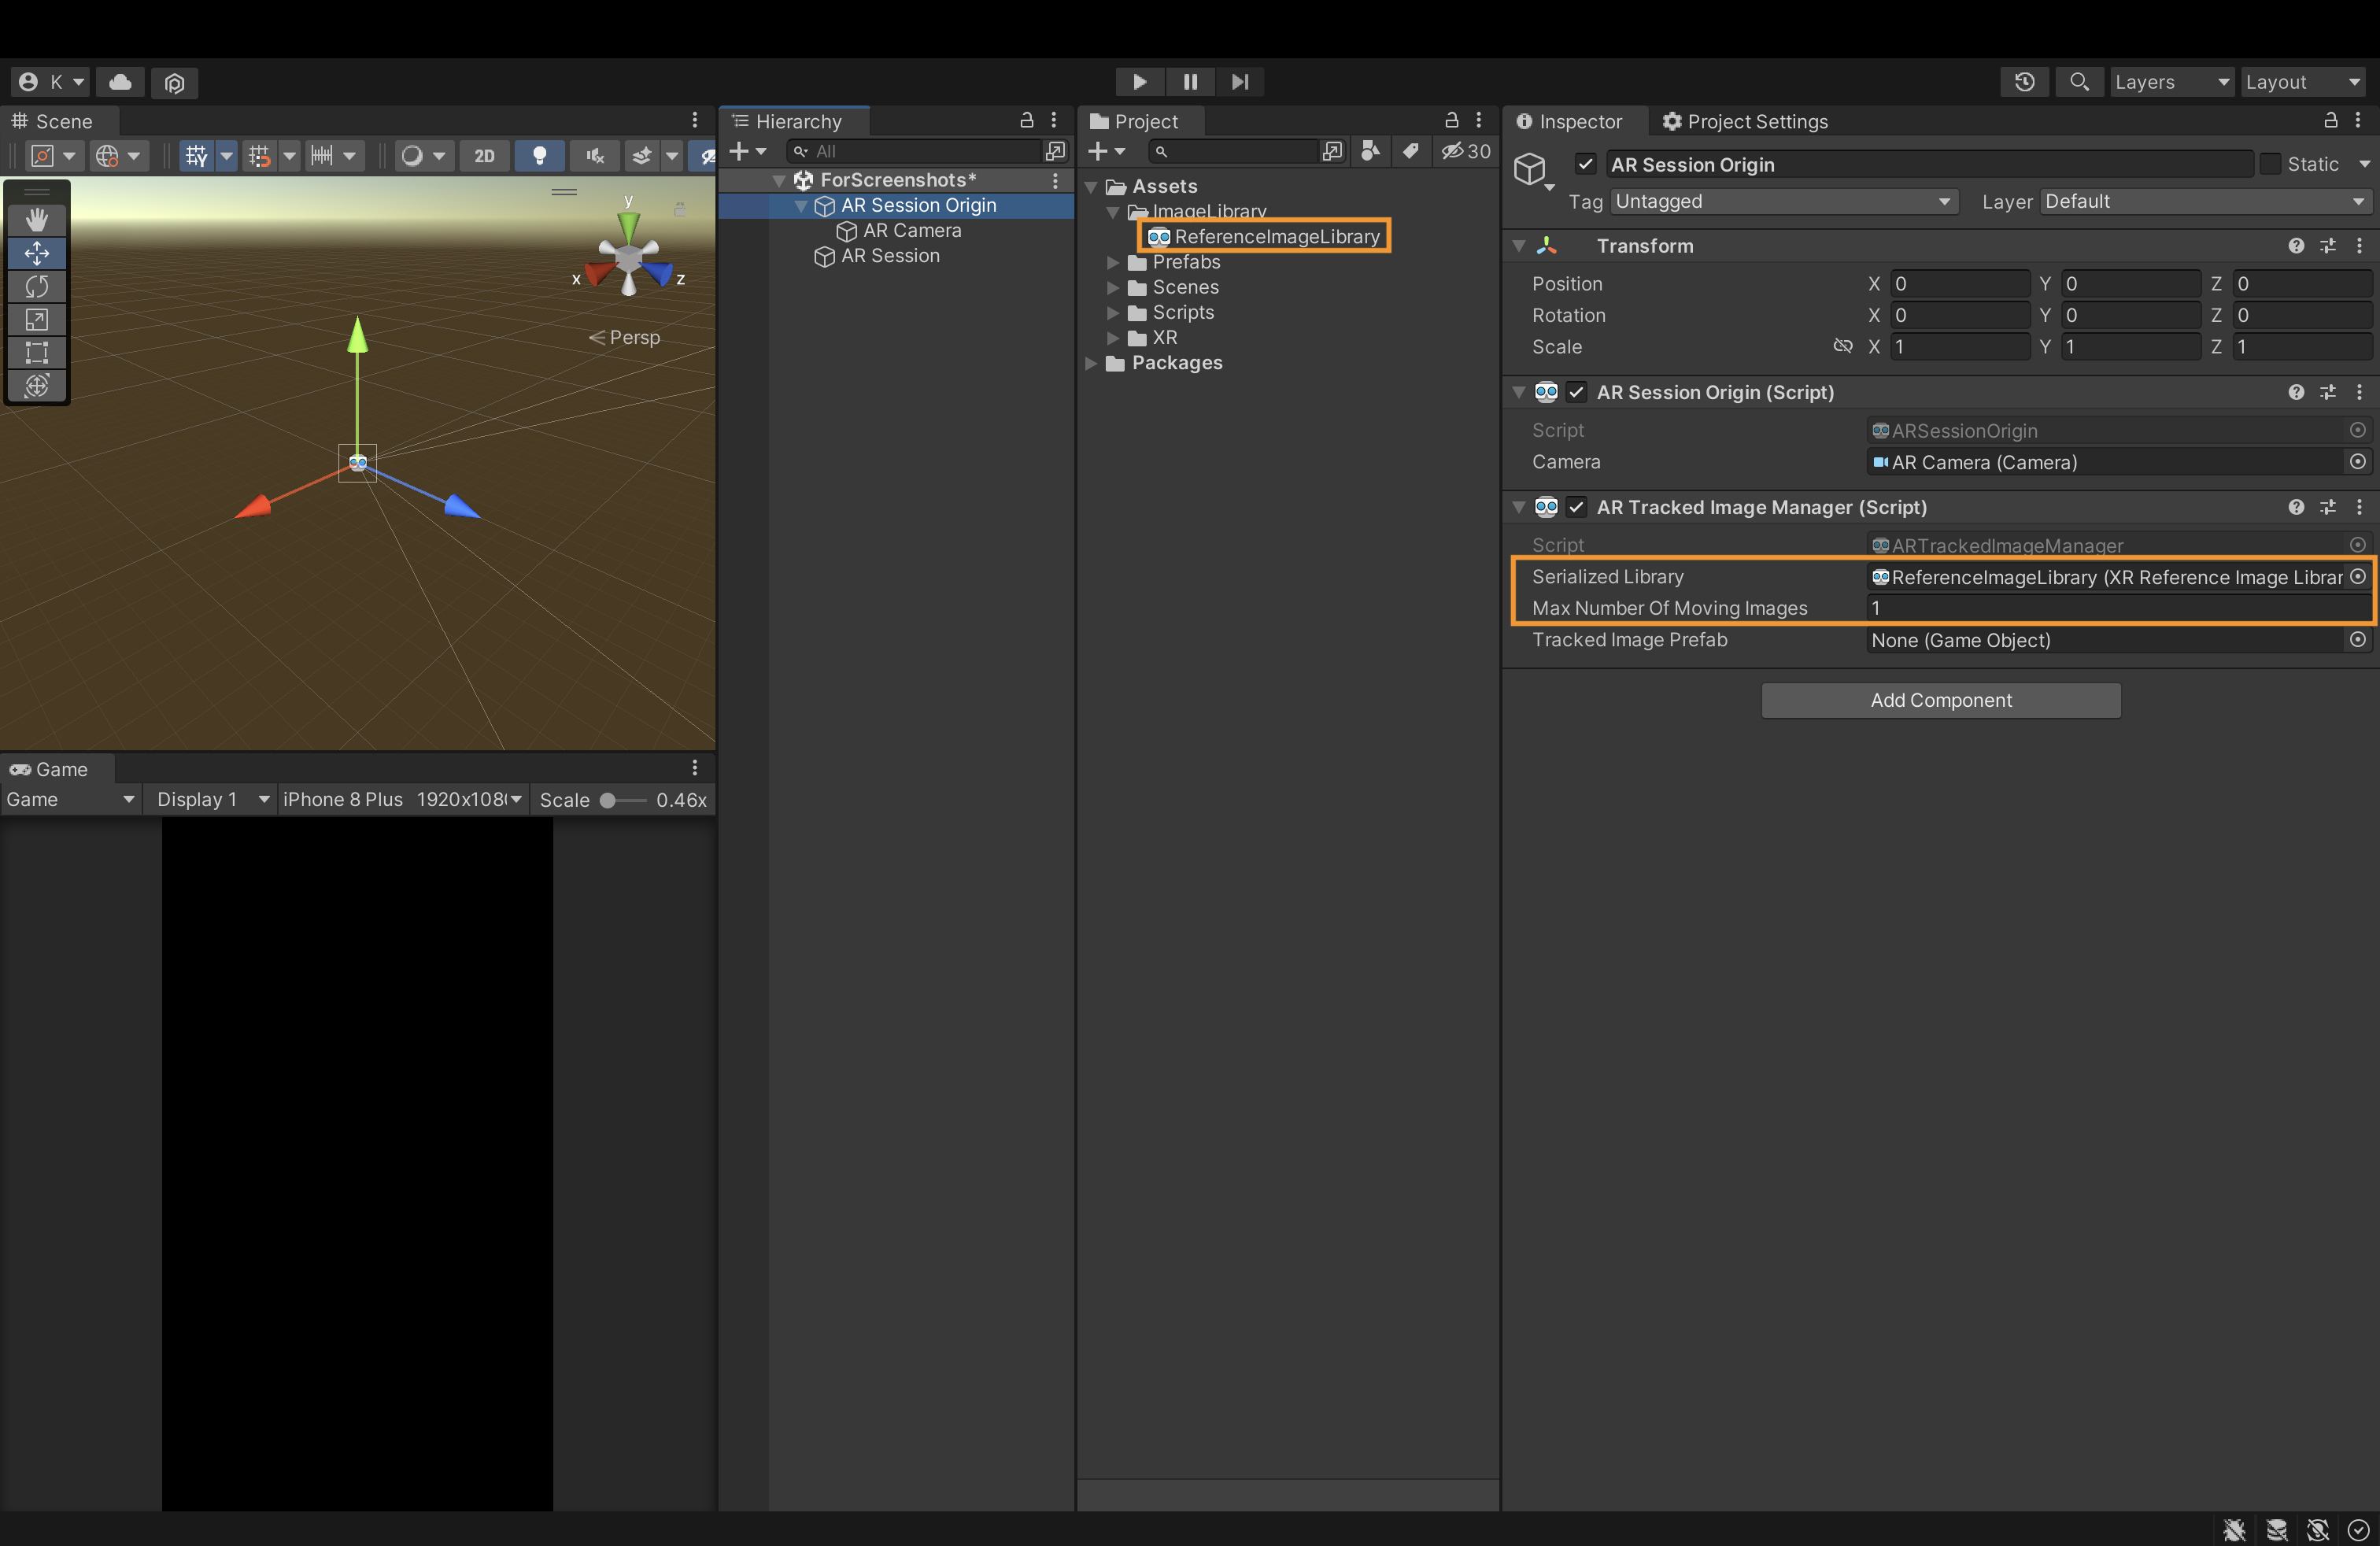
AR Session Originby selecting GameObject -> XR -> AR Session Origin. - Add a new
ARTrackedImageManagercomponent to the AR Session Origin GameObject. - Create a new
ReferenceImageLibraryby selecting Assets -> Create -> XR -> Reference Image Library. and drag it to the “serialized library” field in theARTrackedImageManagercomponent. - Set "Max Number Of Moving Images" field in the
ARTrackedImageManagercomponent to 1. - Create a new
AR Sessionby selecting GameObject -> XR -> AR Session.
Initializing ConjureKit
- Install the ConjureKit package.
- Create a new
MonoBehaviourscript and attach it to an empty game object in the scene. - Import
ConjureKit.
using Auki.ConjureKit;
- Create a private
IConjureKitvariable.
private IConjureKit _conjureKit;
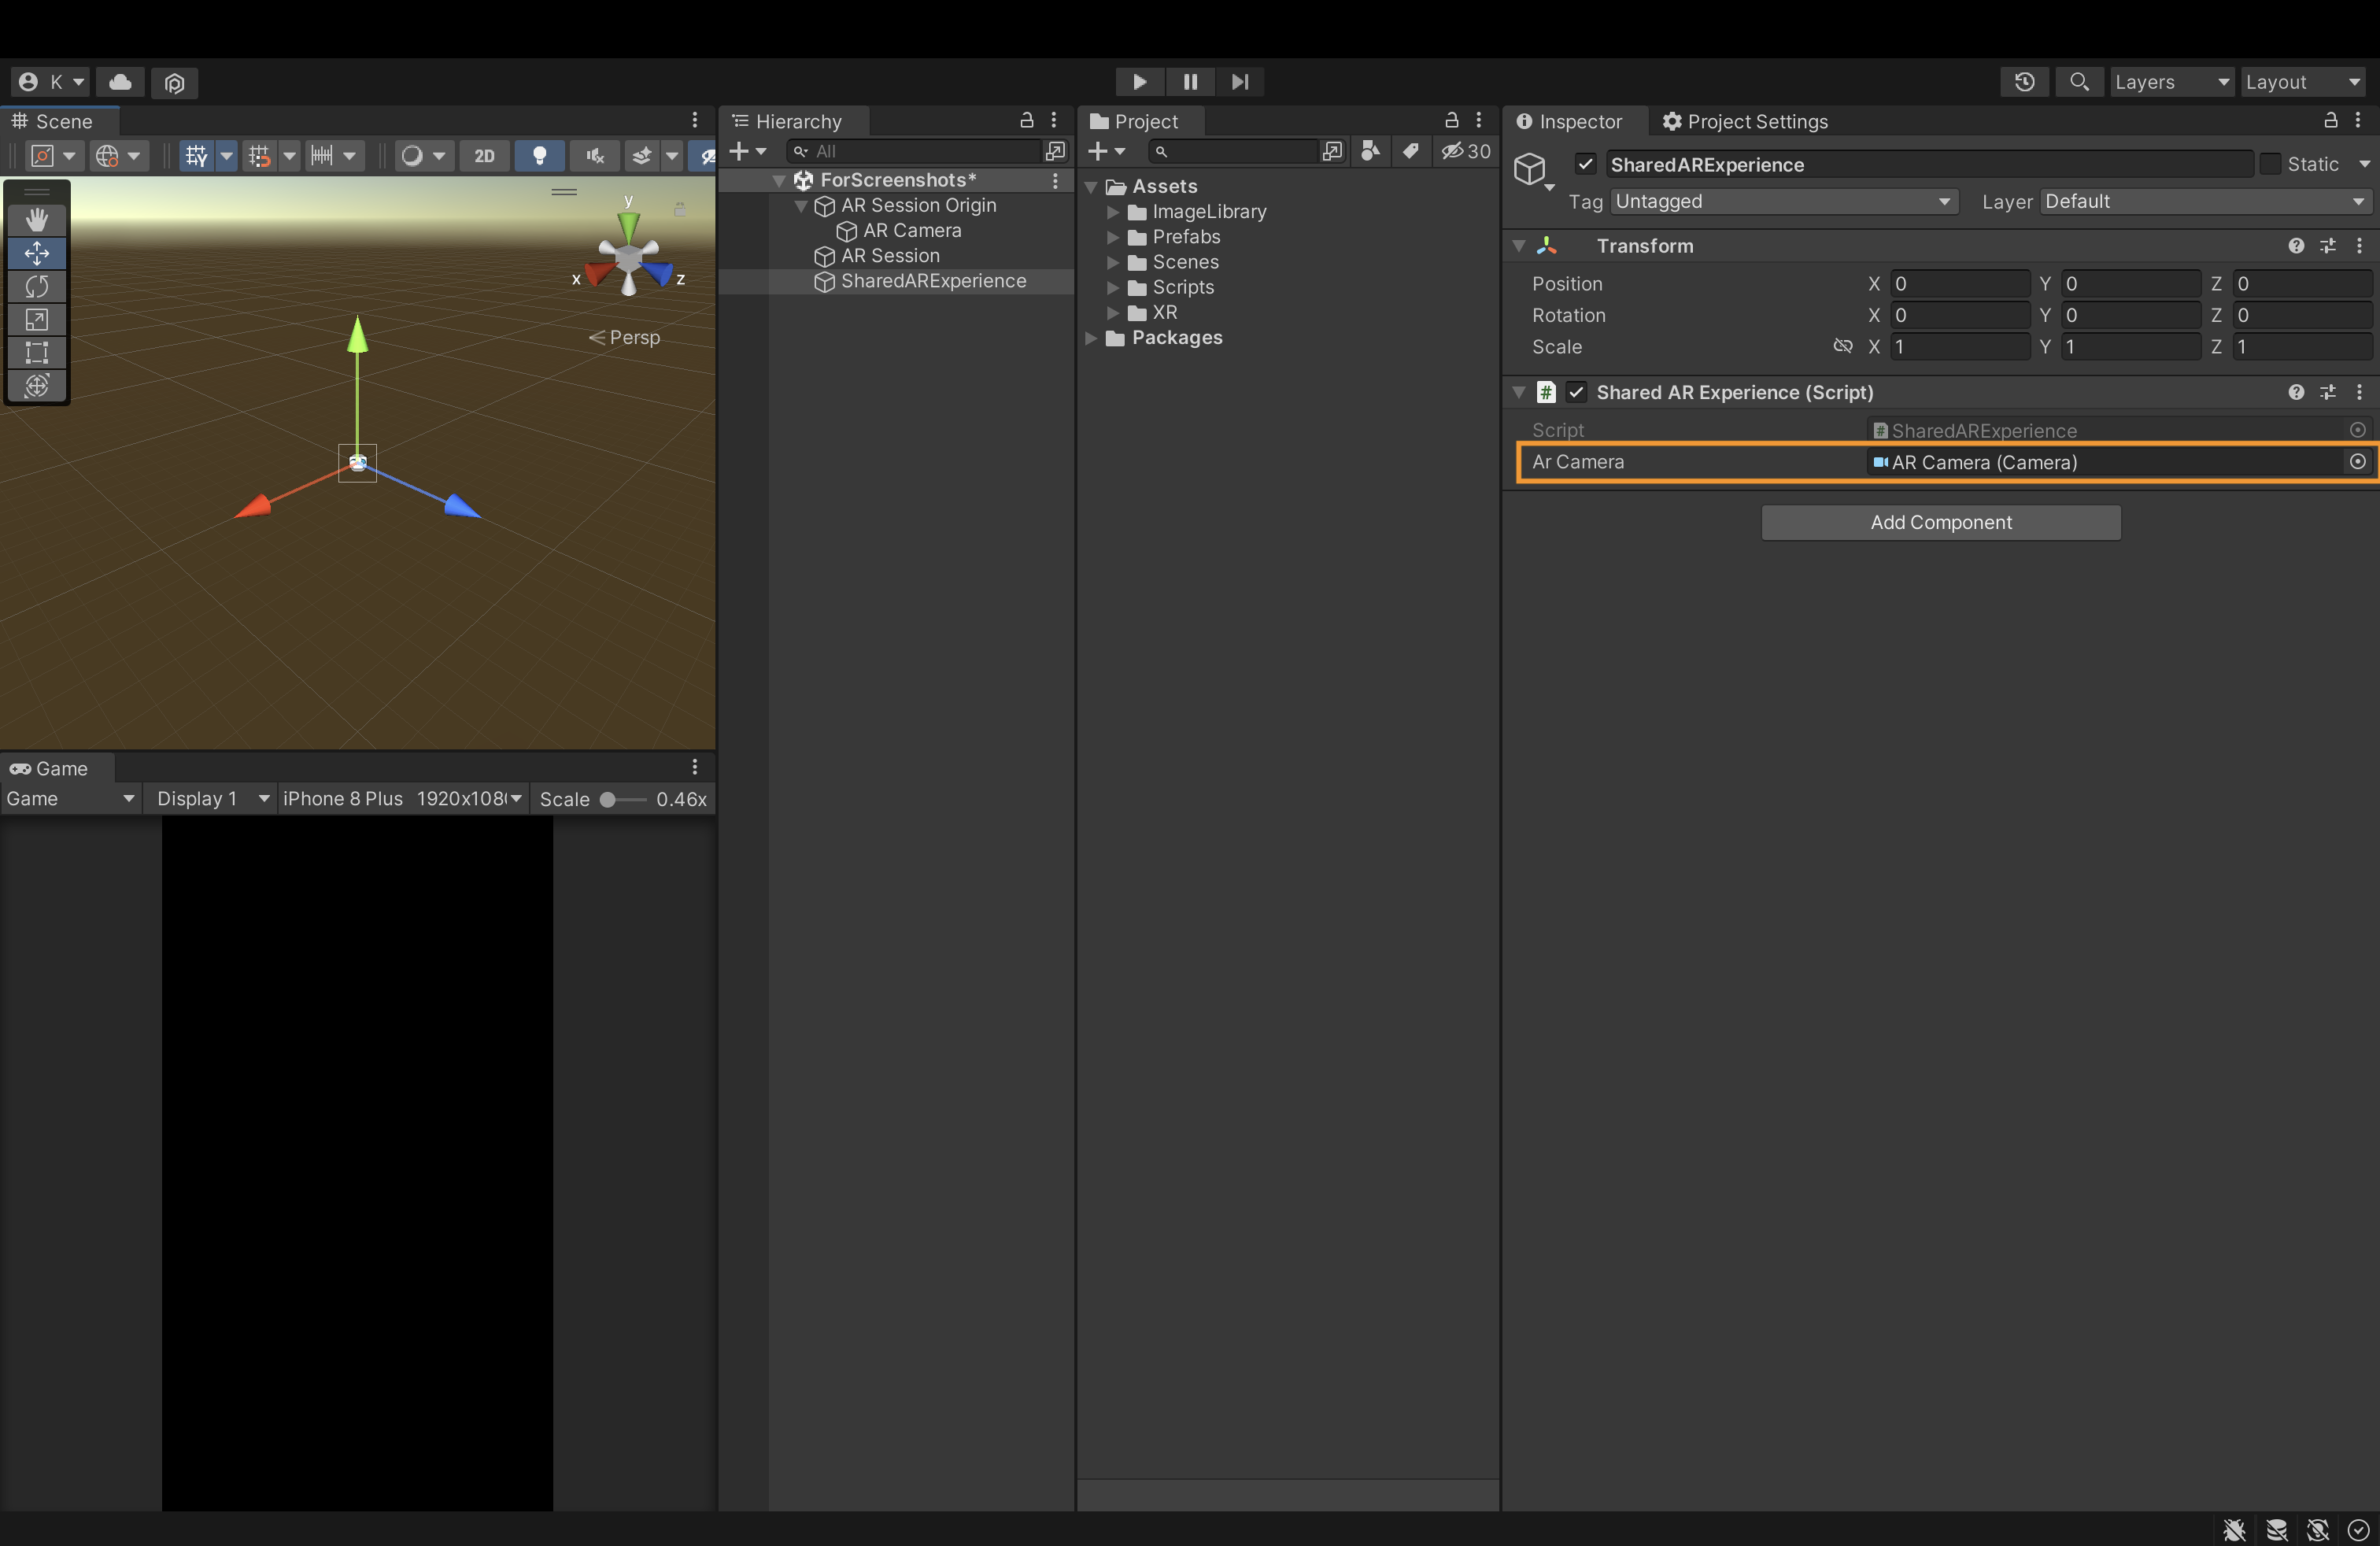
- Create a public
Cameravariable.
public Camera arCamera;
- Drag the
AR Camerato thearCamerafield on the GameObject you created;
- Initialize
ConjureKitwith the app key and secret from the posemesh console (cf. the Quickstart guide)
Never share your app secret with anyone.
- Call
_conjureKit.Connect()to connect to a Hagall server with the lowest latency and create a session.
using Auki.ConjureKit;

public class ConjureKitDemo : MonoBehaviour
{
    public Camera arCamera;

    private IConjureKit _conjureKit;

    private void Start()
    {
        _conjureKit = new ConjureKit(
            ConjureKitConfiguration.Get(), arCamera.transform,
            "YOUR_APP_KEY",
            "YOUR_APP_SECRET");


        _conjureKit.Connect();
    }
}
- Declare two new
Textfields to display the session ID and session state on screen.
[SerializeField] private Text sessionState;
[SerializeField] private Text sessionID;
- Register a callback to the
_conjureKit.OnStateChangedevent that fires every time our session state changes.
_conjureKit.OnStateChanged += state =>
{
    sessionState.text = state.ToString();
};
- Register callback to
_conjureKit.OnJoinedand_conjureKit.OnLeftwhich are triggered when we join and leave a session.
_conjureKit.OnJoined += session =>
{
    sessionID.text = session.Id;
};

_conjureKit.OnLeft += () =>
{
    sessionID.text = "";
};
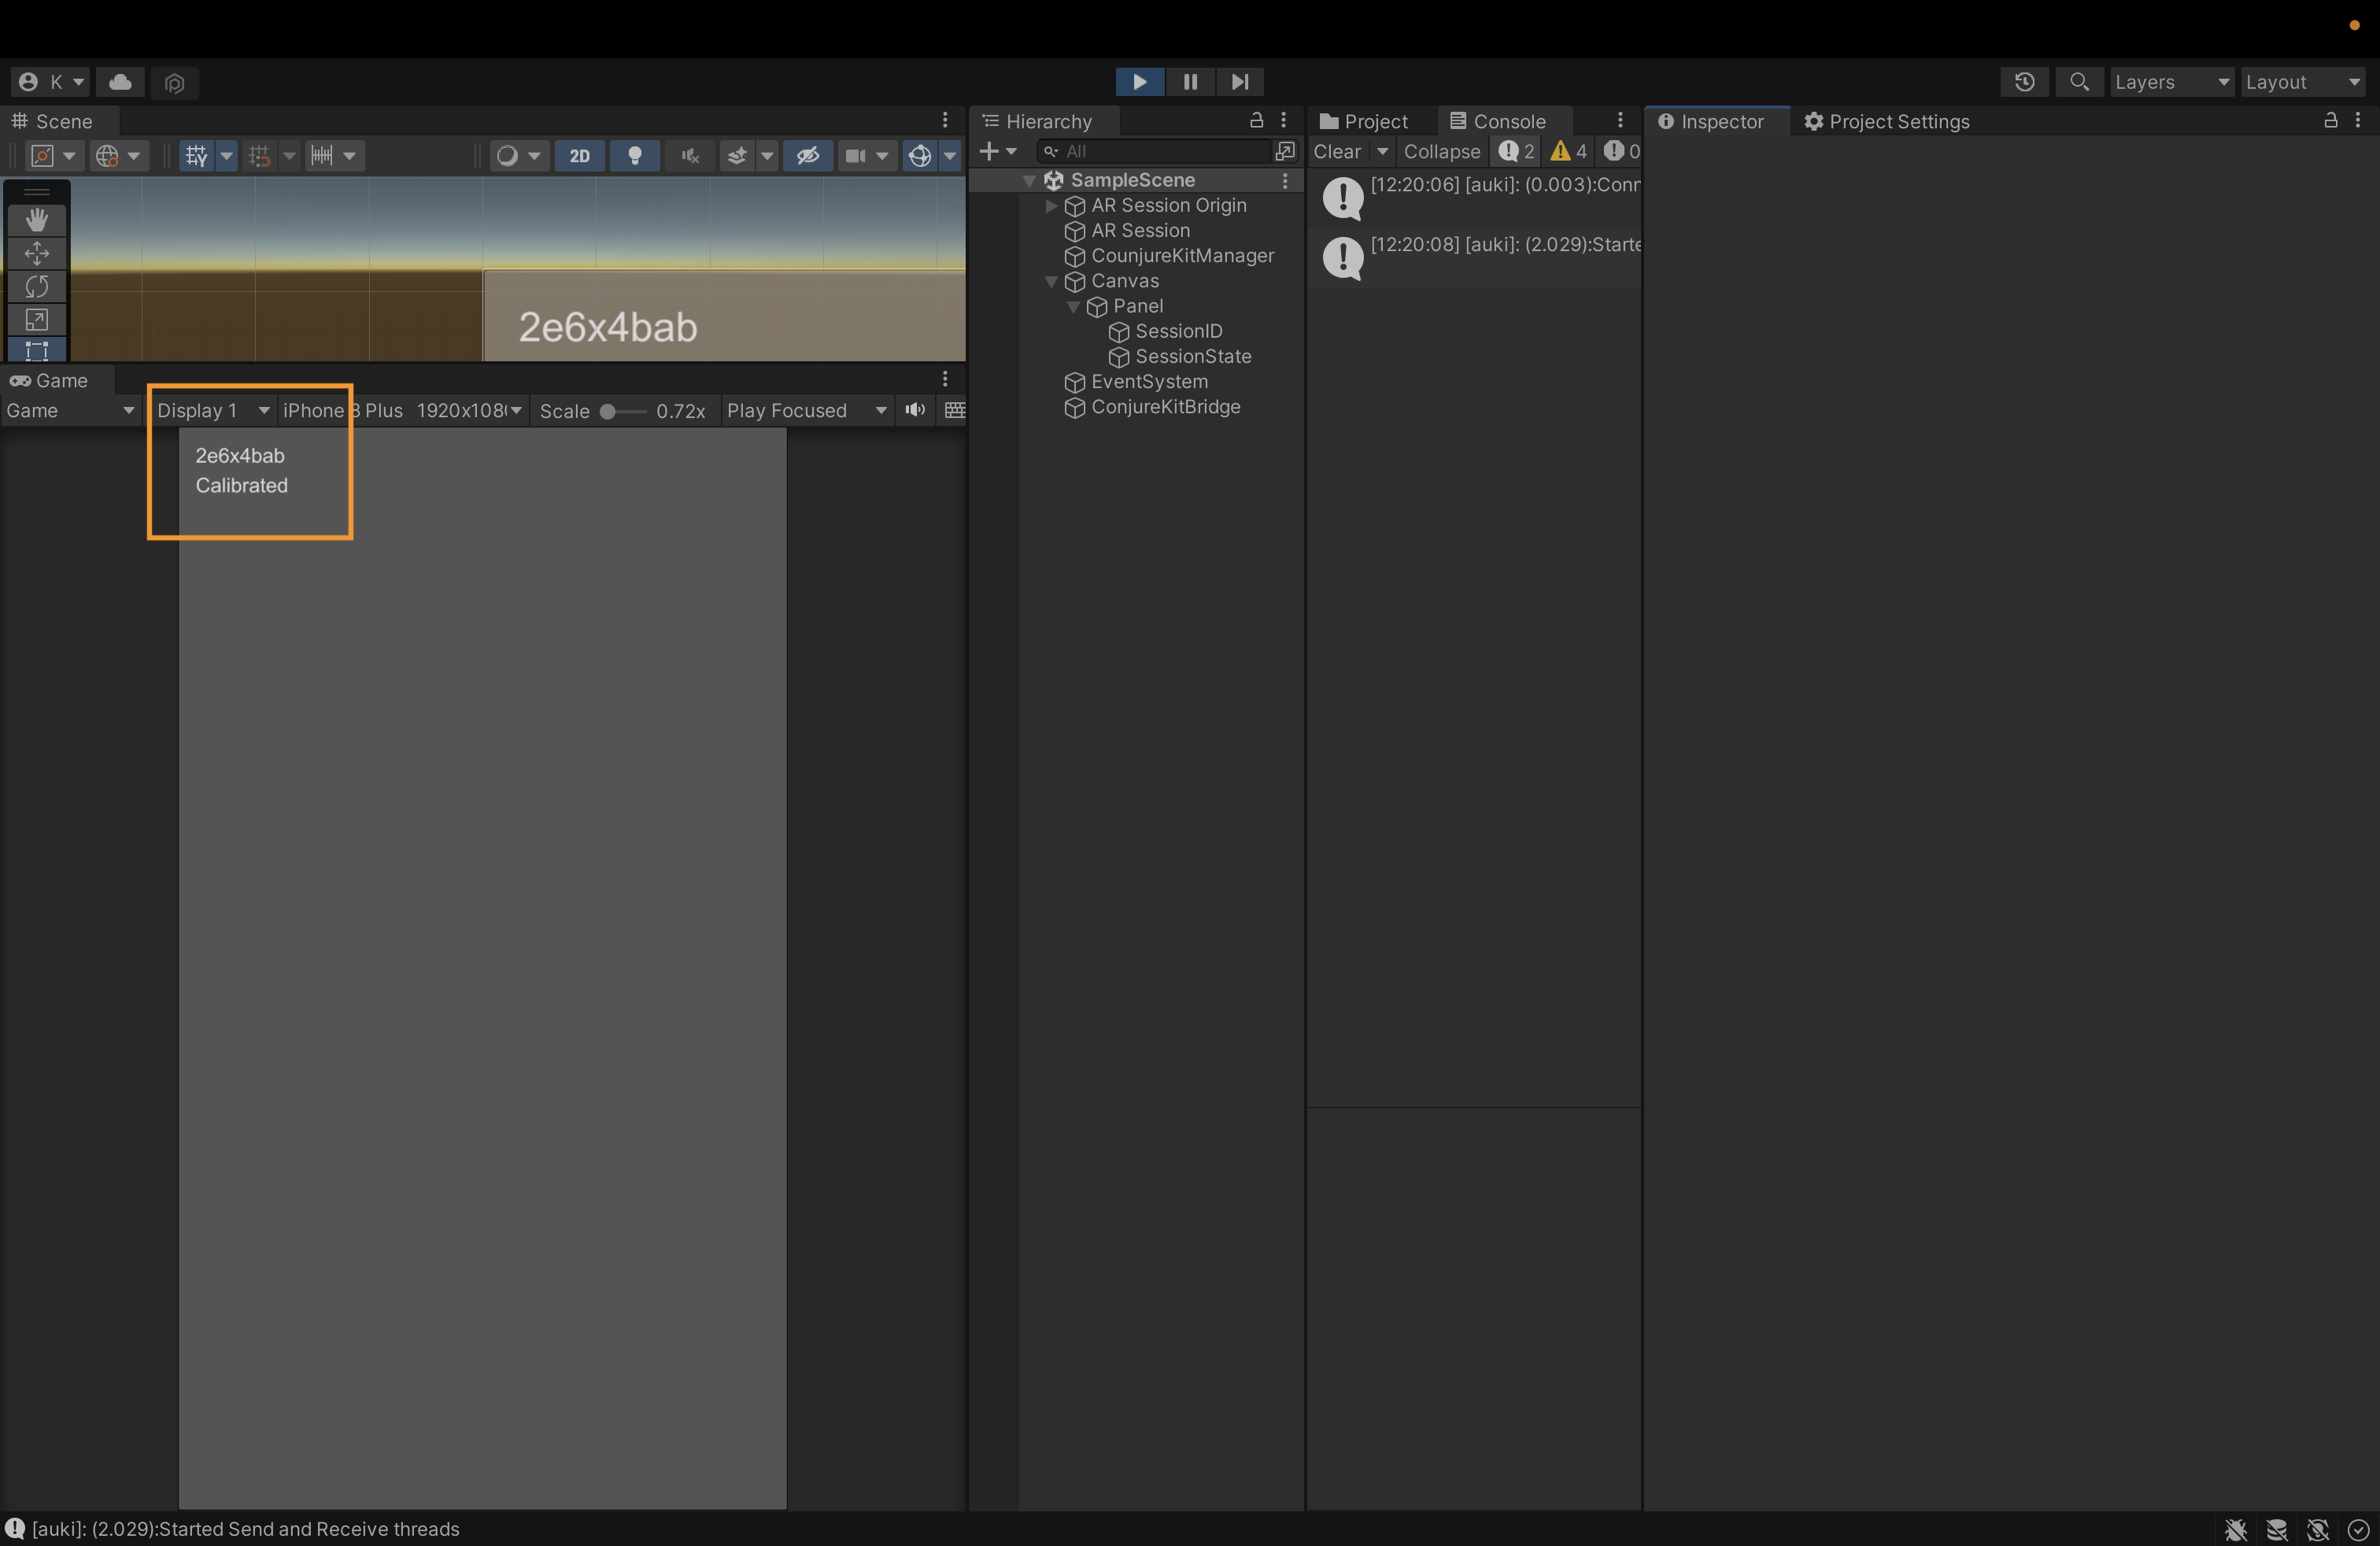
Create two
Textelements and drag and drop them to the fields you declared in step 8.Click Play in Unity Editor. Now you'll see the state of your connection logged in the console and session id and state on the screen.
Adding an entity
Follow these steps to add an Entity to the session and instantiate a Primitive Cube that would appear in the same location in AR for all participants in the session:
- Create a method,
CreateCubeEntity, that adds an Entity to the session
public void CreateCubeEntity()
{
    if (_conjureKit.GetState() != State.Calibrated)
        return;

    Vector3 position = arCamera.transform.position + arCamera.transform.forward * 0.5f;
    Quaternion rotation = Quaternion.Euler(0, arCamera.transform.eulerAngles.y, 0);

    Pose entityPos = new Pose(position, rotation);

    _conjureKit.AddEntity(
        entityPos,
        onComplete: entity => CreateCube(entity),
        onError: error => Debug.Log(error));
}
Calling AddEntity
adds a new Entity to the Session and invokes the onComplete callback, CreateCube, with the newly created entity.
- We need something to visualize the Entities. Declare a public GameObject variable to reference a cube prefab.
Implement the
CreateCubemethod that instantiates a cube with a Pose.
[SerializeField] private GameObject cube;
private void CreateCube(Entity entity)
{
    if (entity.Flag == EntityFlag.EntityFlagParticipantEntity) return;

    Instantiate(cube, entity.Pose.position, entity.Pose.rotation);
}
We first chack that the entity is not the special participant entity that is created automatically when a participant joins a session.
- Declare a
Buttonvariable to reference the button that will invokeCreateCubeEntitymethod.
[SerializeField] private Button spawnButton;
We want this button to be interactable only when the session state is calibrated.
Add a ToggleControlsState method and invoke it in _conjureKit.OnStateChanged callback.
_conjureKit.OnStateChanged += state =>
{
    sessionState.text = state.ToString();
    ToggleControlsState(state == State.Calibrated);
};
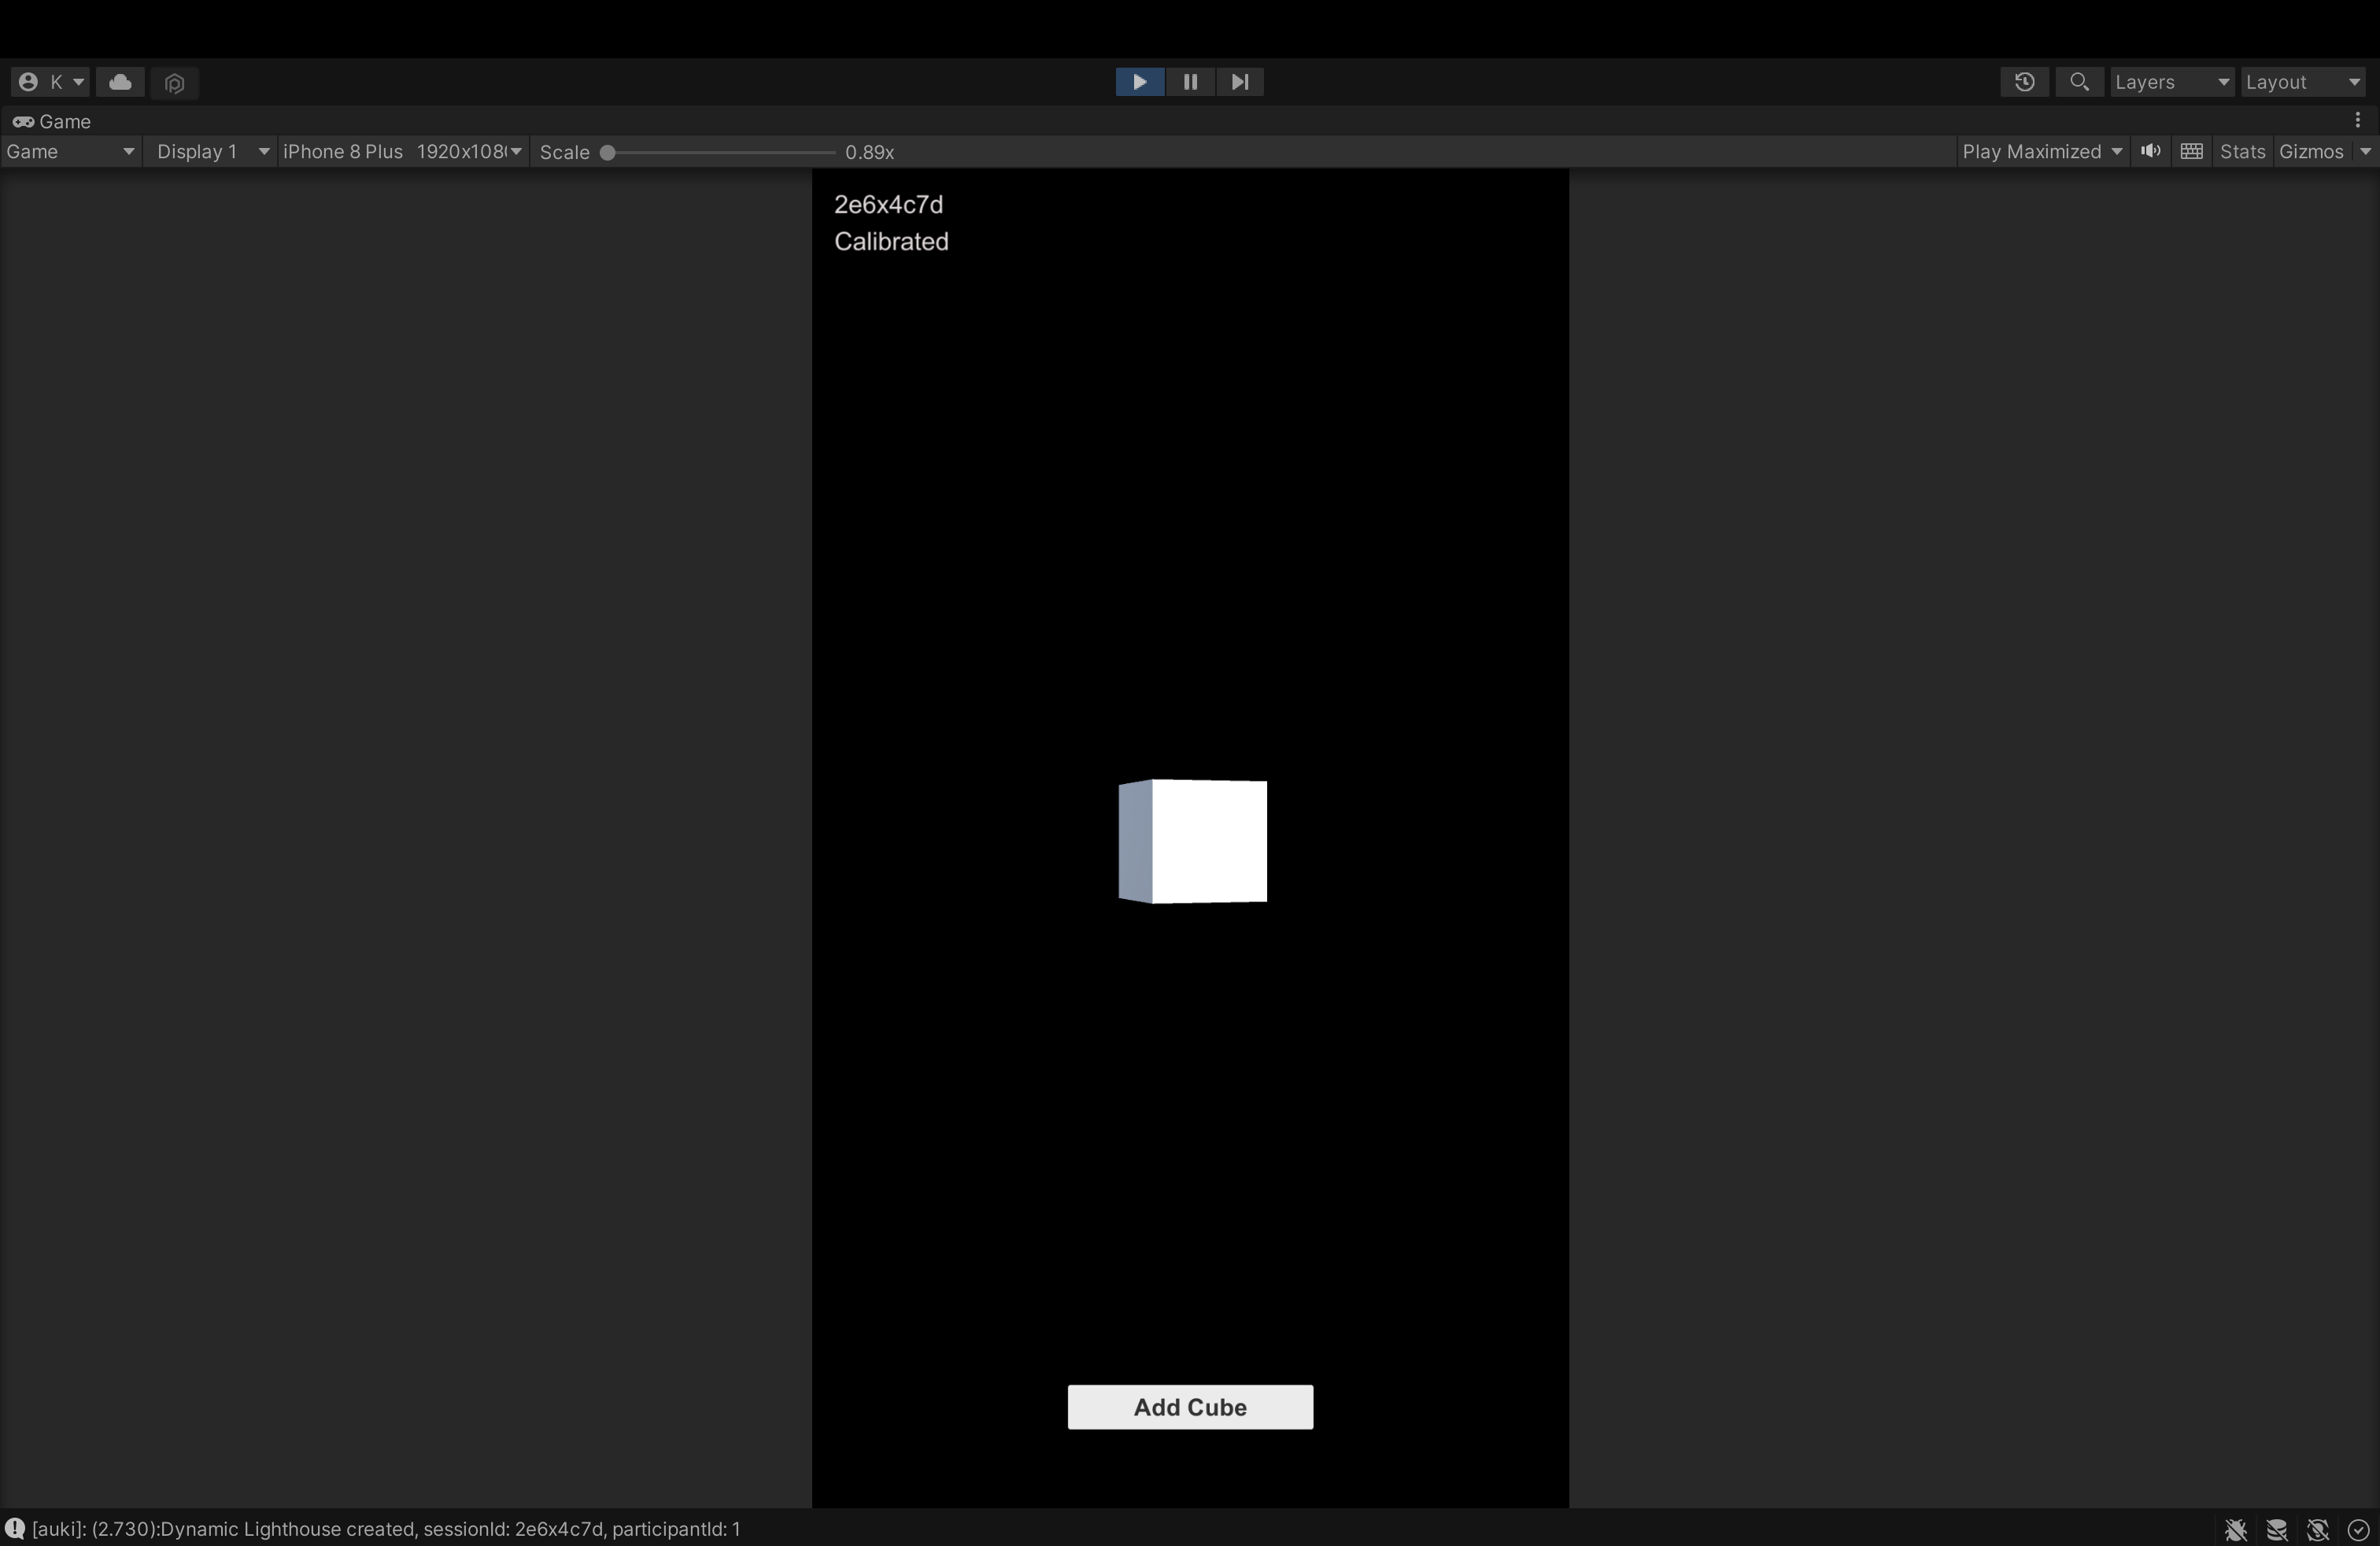
Create a primitive cube by selecting GameObject -> 3D Object -> Cube. Change the scale of the cube to
0.1so it appears as a 10cm cube in AR. Drag and drop it into the Assets folder in the Project window to create a prefab and delete the cube from the scene. Drag the cube prefab to the field you declared in step 2.Add a
Buttonto the scene, configure the on click callback to invokeCreateCubeEntitymethod. Drag the button game object to the field you declared in step 3.
If you run the project now you should see the cube in front of the camera.
Instant calibration
Manna module makes it easy to join a session and get instantly calibrated into a shared coordinate system by scanning a Lighthouse (a QR code in this case). Follow these steps to install and use Manna:
Open the Package Manager and install the
Mannamodule.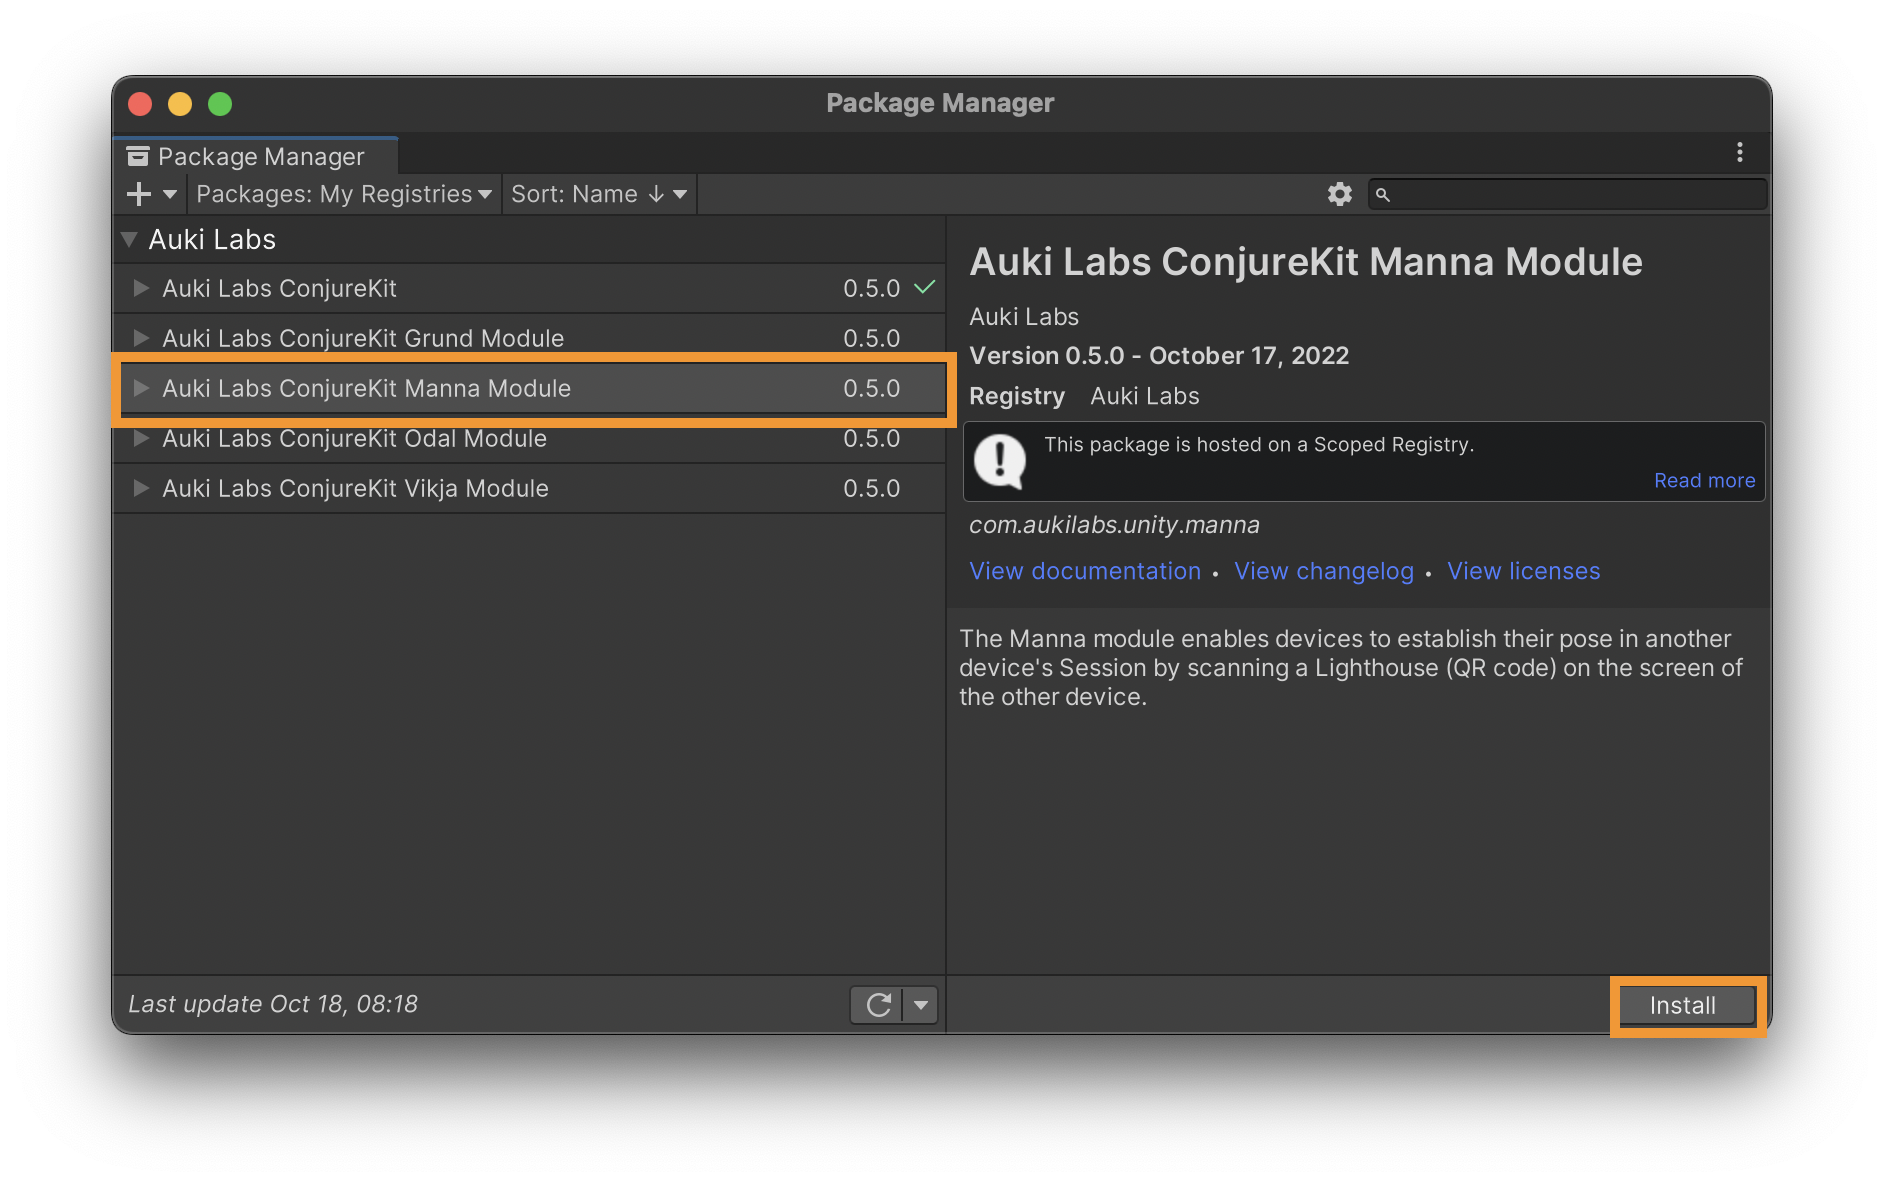 tip
tipIf you are experiencing issues with Unity editor when installing a new package, try restarting Unity.
Import
Manna
using Auki.ConjureKit.Manna;
- Create a private
Mannavariable and initialize it right after ConjureKit
private Manna _manna;
_manna = new Manna(_conjureKit);
- Declare a
Buttonvariable that will enable and disable the QR code and aboolvariable to save the QR code visibility state.
[SerializeField] bool qrCodeBool;
[SerializeField] Button qrCodeButton;
- Toggle the QR code button interactable state in
ToggleControlsStatemethod.
private void ToggleControlsState(bool interactable)
{
    if (spawnButton) spawnButton.interactable = interactable;
    if (qrCodeButton) qrCodeButton.interactable = interactable;
}
- Add a
ToggleLighthousemethod and use _manna.SetLighthouseVisible(true) to show and hide the Lighthouse (QR code).
public void ToggleLighthouse()
{
    qrCodeBool = !qrCodeBool;
    _manna.SetLighthouseVisible(qrCodeBool);
}
Add a
Buttonto the scene, configure the on click callback to invokeToggleLighthousemethod. Drag the button game object to the field you declared in step 5.Subscribe to OnEntityAdded event to create cubes when other participants add entities in the session.
_conjureKit.OnEntityAdded += CreateCube;
Build to XCode
In File -> Build settings, make sure that you have added open scenes before building to Xcode.
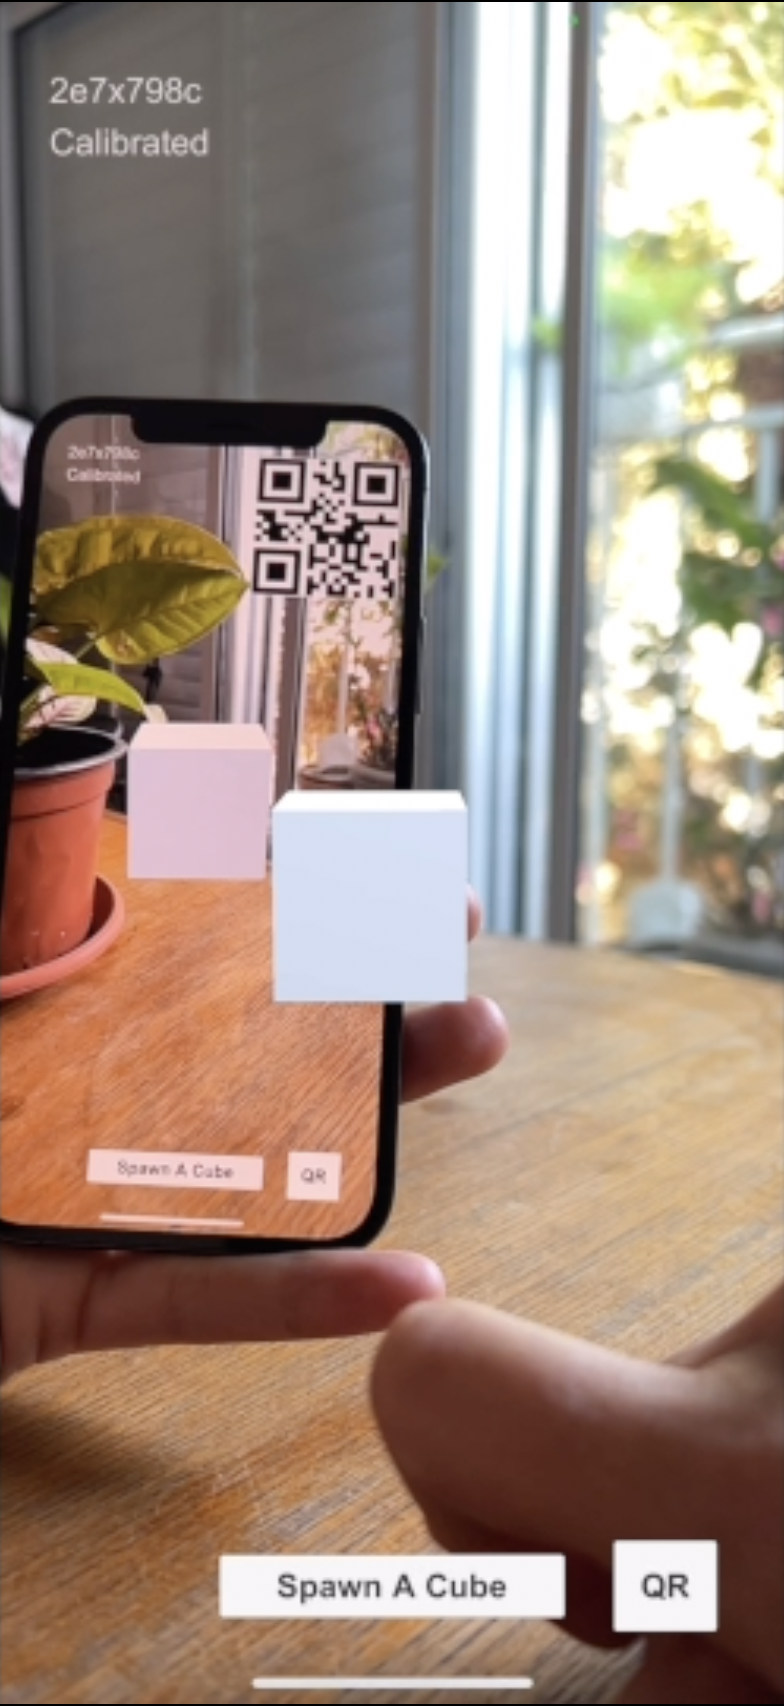
Another Device B running the same app as Device A can now join Device A's Session by scanning the Lighthouse (QR code) of Device A.
Complete code
using System.Collections;
using System.Collections.Generic;
using UnityEngine;
using Auki.ConjureKit;
using UnityEngine.UI;
using Auki.ConjureKit.Manna;

public class ConjureKitManager : MonoBehaviour
{
    private IConjureKit _conjureKit;
    public Camera arCamera;

    [SerializeField] private Text sessionState;
    [SerializeField] private Text sessionID;

    [SerializeField] private GameObject cube;
    [SerializeField] private Button spawnButton;

    private Manna _manna;

    [SerializeField] bool qrCodeBool;
    [SerializeField] Button qrCodeButton;

    void Start()
    {
        _conjureKit = new ConjureKit(
            ConjureKitConfiguration.Get(), arCamera.transform,
            "YOUR_APP_KEY",
            "YOUR_APP_SECRET");

        _manna = new Manna(_conjureKit);

        _conjureKit.OnStateChanged += state =>
        {
            sessionState.text = state.ToString();
            ToggleControlsState(state == State.Calibrated);
        };

        _conjureKit.OnJoined += session =>
        {
            sessionID.text = session.Id.ToString();
        };

        _conjureKit.OnLeft += () =>
        {
            sessionID.text = "";
        };

        _conjureKit.OnEntityAdded += CreateCube;

        _conjureKit.Connect();
    }

    private void ToggleControlsState(bool interactable)
    {
        if (spawnButton) spawnButton.interactable = interactable;
        if (qrCodeButton) qrCodeButton.interactable = interactable;
    }

    public void ToggleLighthouse()
    {
        qrCodeBool = !qrCodeBool;
        _manna.SetLighthouseVisible(qrCodeBool);

    }

    public void CreateCubeEntity()
    {

        if (_conjureKit.GetState() != State.Calibrated)
            return;

        Vector3 position = arCamera.transform.position + arCamera.transform.forward * 0.5f;
        Quaternion rotation = Quaternion.Euler(0, arCamera.transform.eulerAngles.y, 0);

        Pose entityPos = new Pose(position, rotation);

        _conjureKit.AddEntity(
            entityPos,
            onComplete: entity => CreateCube(entity),
            onError: error => Debug.Log(error));
    }

    private void CreateCube(Entity entity)
    {
        if (entity.Flag == EntityFlag.EntityFlagParticipantEntity) return;

        Instantiate(cube, entity.Pose.position, entity.Pose.rotation);
    }
}